
alright so here's my step by step process for my 1st gocco project!
in order to make your image burn onto the screen
you need carbon in your print out it's the key ingredient
- this means if you create your image/ pattern on the computer you either need to use a laser printer (has carbon) or print off from your ink jet (which i have) and run to office depot or kinkos and run off a xerox copy (which has carbon).
- when i got back with my xerox copies i cut the images out and lined them up with the grid of the gocco drawing papers, to ensure that my images where square.
 here are 3 pre-master screen layouts, i crammed a lot on each screen (i figure why waste a screen on 1 graphic, why not fill it all up?) the dark image all the way to the right is the one i plan on using for the rehearsal dinner invites.

here's the layering order
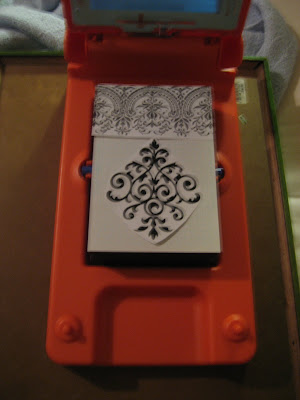
- next you place the images you want to burn onto the pad w/ grid
- then you slide the blue screen in next to the plexi glass window
- between the blue screen and the image you want to burn - you slide in the mesh screen with it's blue side facing you & red arrow pointing down.
- next you put what i'll call the flash bulb house in the top
- push down and you'll see a bright flash
- for good measure, i dunno if it helps/matters of not, but i hold the lid down for a few seconds. to me it seems like the extra heat time might help further the image transfer! i might be crazy though... =)
- then go ahead and take off the flash bulb house and throw away the bulbs (remember they're toxic)
- take the screen out along with the blue screen ( you're done using it now you can put it away) and pull back the plastic flap of the mesh screen and foam block around the image you want to use
- apply your desired ink inside the foam block - the dark areas are where the ink will push through the screen
- put the screen back in the gocco unit the same with blue side facing out and red arrow pointing down.
- put your paper on the foam printing pad and stamp away!

here i was printing the envelope flaps and it got a little messy, remember if you don't have a paper covering the whole area that is currently inked it will make a mess kinda like you see above! oops

i was gocco'ing outside enjoying the sunny day!

i used the design template from the Weddingbee guest blogger
and then used my gold ink, which my camera did not do the ink any JUSTICE!
it has a beautiful shimmer to the ink which you can't see in the pic. the card stock is from paper source size A6 in Pool
i guess this is the start of my gocco obsession!
if anyone has gocco questions feel free to ask, i've become a quasi expert while i was procrastinating on using my unit!

0 comments:
Post a Comment